Prerequisites for configuring LTI 1.3 Schedule ToolUNIVERSE accounts with owner or admin privileges.
Don’t register this configuration more than once in your Canvas platform. Only the first one would be valid to use. If the admin wants to remove this tool, just delete them from developer key lists.
Step 1: Creating LTI and API key in Canvas
Log in to Canvas.
Click Admin, then click Developer Keys.
1.1 Create LTI Key in Canvas
Click Developer Key and choose the LTI Key.

Choose the JSON method to create the integration:
1. Set Key Name to UNIVERSE TOOL.
2. Copy the following Redirect URL and paste it in the Canvas Redirect URLs field.**<https://lynyzdngm5.execute-api.eu-central-1.amazonaws.com/dev/verify_id_token**>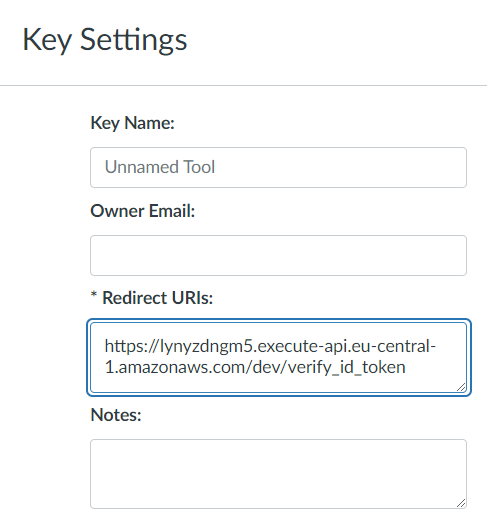
3. Change the Method to Paste JSON.
4. Copy the following JSON script and paste it to the LTI 1.3 configure field.{ "title": "UNIVERSE Tool", "scopes": [ "https://purl.imsglobal.org/spec/lti-ags/scope/lineitem", "https://purl.imsglobal.org/spec/lti-ags/scope/lineitem.readonly", "https://purl.imsglobal.org/spec/lti-ags/scope/result.readonly", "https://purl.imsglobal.org/spec/lti-ags/scope/score", "https://purl.imsglobal.org/spec/lti-nrps/scope/contextmembership.readonly", "https://canvas.instructure.com/lti/public_jwk/scope/update", "https://canvas.instructure.com/lti/account_lookup/scope/show", "https://canvas.instructure.com/lti/data_services/scope/create", "https://canvas.instructure.com/lti/data_services/scope/show", "https://canvas.instructure.com/lti/data_services/scope/update", "https://canvas.instructure.com/lti/data_services/scope/list", "https://canvas.instructure.com/lti/data_services/scope/destroy", "https://canvas.instructure.com/lti/data_services/scope/list_event_types", "https://canvas.instructure.com/lti/feature_flags/scope/show", "https://canvas.instructure.com/lti-ags/progress/scope/show" ], "extensions": [ { "platform": "canvas.instructure.com", "settings": { "platform": "canvas.instructure.com", "placements": [ { "enabled": "true", "placement": "course_navigation", "display_type": "full_width_in_context", "message_type": "LtiResourceLinkRequest", "target_link_uri": "https://schedule.io?deploymentId=<your_deployment_id>" } ] }, "privacy_level": "public" } ], "public_jwk": { "e": "AQAB", "n": "5fq4SabbjsJAFJvdNW9-NA67eX0k-dhCXGUX2n-4V1GQ_T-6AyM0UzvFkPhbq-_LcDeFrdF8KVQR-Txy-IiYDIRvl9_Ik7ExnHj2wrBUzAvJK3Se8iiHWfOGMi_GTIcdbmJ2Qm3-Ye-V_DQQNCfaNPFS9978MXMo5KDZPPp2dlfUO07bGBiI-uDuy7KBTOwYmpMaGSPi_CXTpBCG9RoE20vKPlSWq_GnvvEHhR8QkMYDIGyAJ_uAPIK7fC0YucYOOdV4pntKfg7KhnWgHg3q-85FFe6bUO4AavQEI1hmUacfweJJaQ7xG48ry-78eMe5QCVdfLM3Y5CLFXwEXZKt2foVKqKR1B1HEvF4Q17JV-QJj0xPaF59Usb8kOor3k_GL2O-d3LeHGSTK4TouU6b2WXf8rUiTsPBVdJSt4DPXwzZgpZbh67AeQqVI3y-9jvFe7vR6tTarjO7steuA0EYuHDmt-6GvnXs3B8GQ9kCXLJKXvFe6x2NhpxeJLPCCMfA1bU8yJs5t3DiBzDaVtCrJKEy62QwpwsFHHV0gLtrO6JvjlVBNieLoieMpRVOJozakDWrZiObR3UbteHFoMKcdeVAsSCdnmAcIkVmnVHC4D6PKEl7XelJcDTbB95GPqCshVzQ5zx5wQRD1v6Dl0SS9wfIMiLGl_leYK-Vyki9kJE", "alg": "RS256", "kid": "c4d8bf5e-3cc1-4b42-bf56-2aa2fe2c1c39", "kty": "RSA", "use": "sig" }, "description": "UNIVERSE Tool", "custom_fields": { "canvas_course_id": "$Canvas.course.id", "canvas_api_domain": "$Canvas.api.domain", "canvas_user_email": "$Person.email.primary", "canvas_course_role": "$Canvas.membership.roles" }, "public_jwk_url": "https://lti-public-key-json.s3.eu-central-1.amazonaws.com/lti_public_jwk.json", "target_link_uri": "https://www.schedule.io/", "oidc_initiation_url": "https://lynyzdngm5.execute-api.eu-central-1.amazonaws.com/dev/lti_tool_init_login" }
Click Save.
Set the developer key State to ON.
1.2 Create API Key in Canvas
Click Developer Key and choose the API Key.
Set Key Name to API: UNIVERSE LTI Schedule Tool.
Copy the following Redirect URL and paste it in the Canvas Redirect URLs field.
**<https://develop.d3w2p9s1swgmsl.amplifyapp.com>**Enable Enforce Scopes, select calendar_events_api, and then save.
Set the developer key State to ON.
Step 2: Create App
Log in to Canvas.
Click Admin, click Settings, then choose the Apps tab.
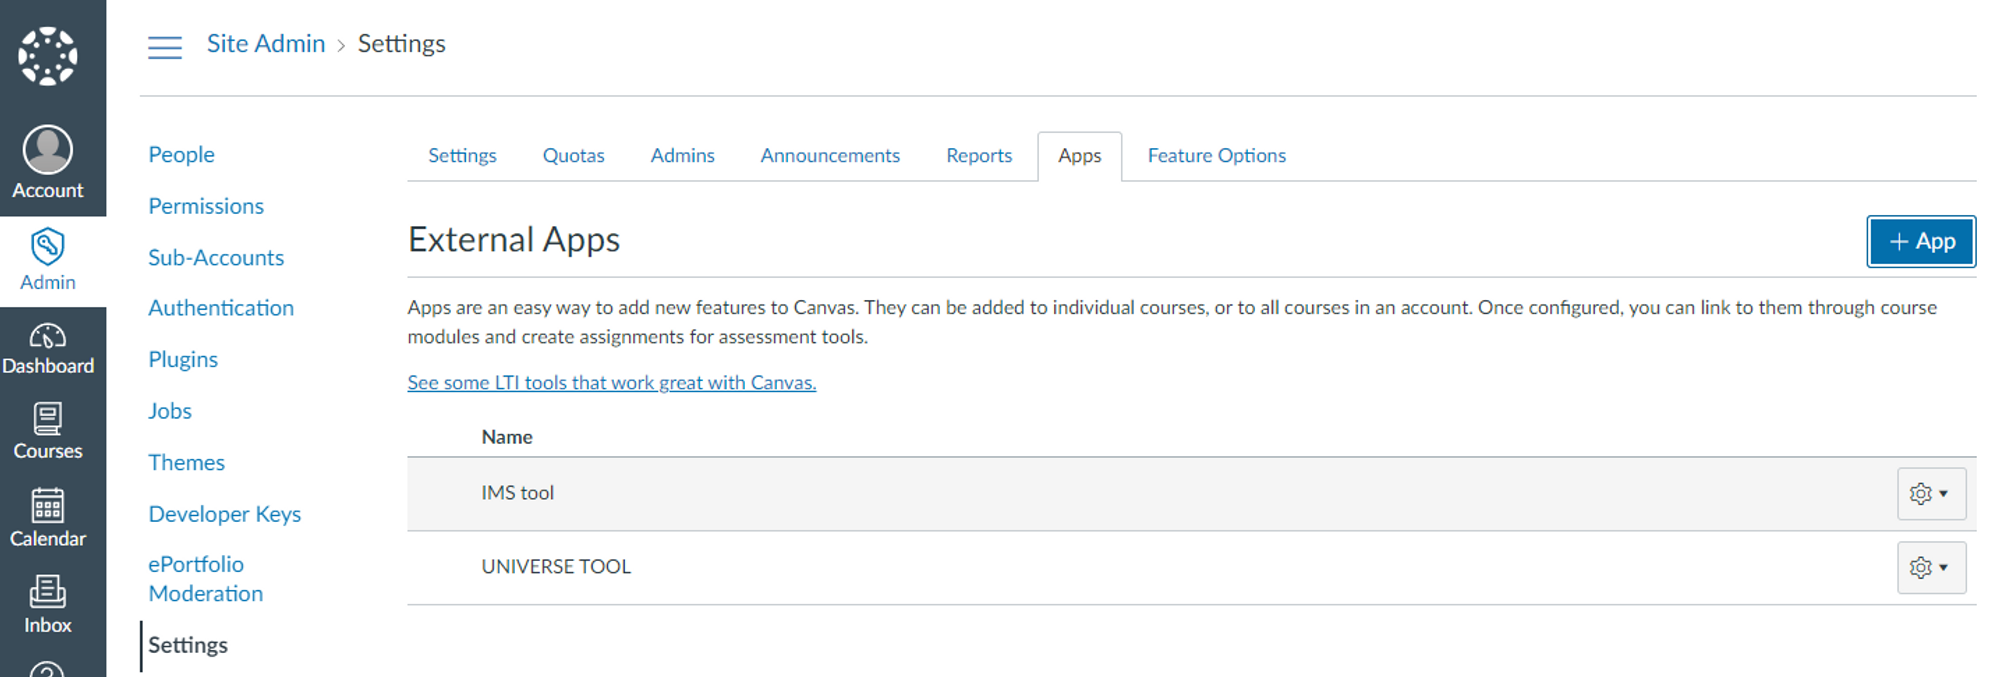
Click + App, then the Add App screen will appear as below.

Change the Configuration Type to By Client ID.

Copy the Developer Id from the Canvas LTI Developer Key and paste it into this Client ID field.

Click Submit, then click Install.

Click on the settings of UNIVERSE: Schedule Tool, and in the menu, click on Deployment Id to obtain the information.
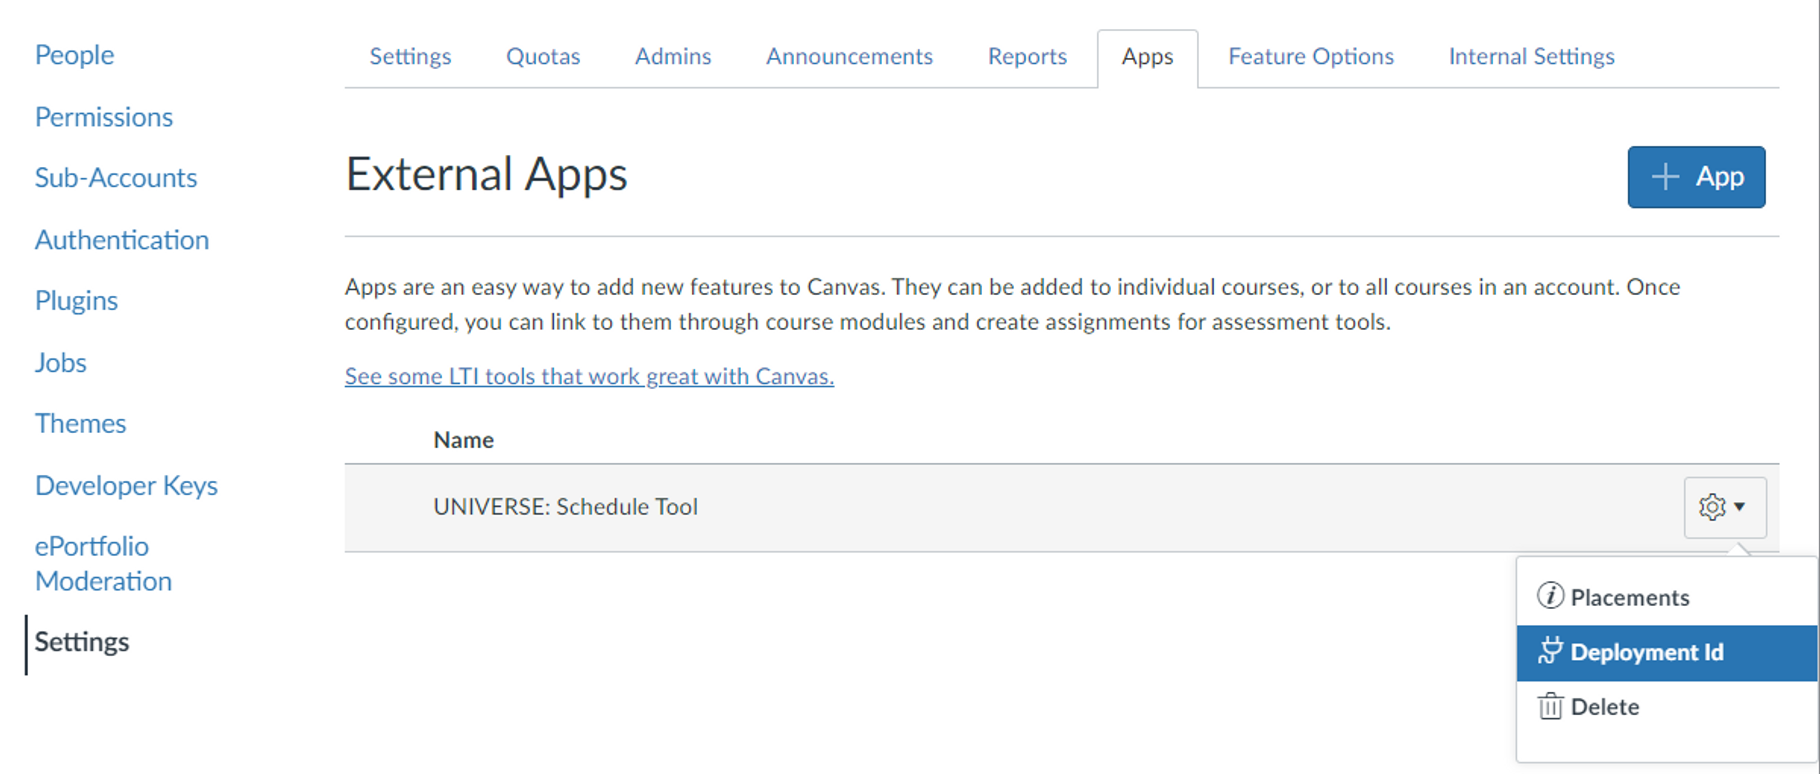
Copy the Deployment Id.
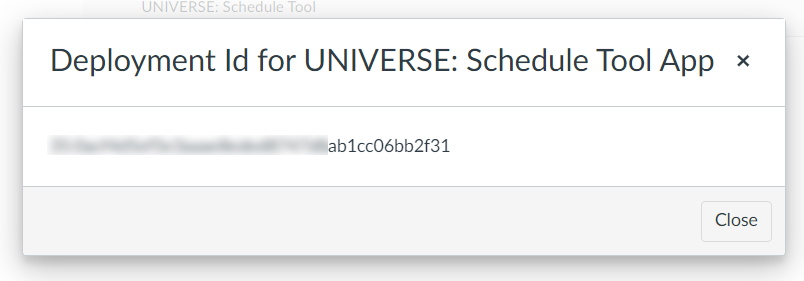
Go to the Developer Keys page and click on Edit this key in the "Actions" section.

On the Key Settings page, enable Course Navigation and paste the copied Deployment Id into the Target Link URI field.
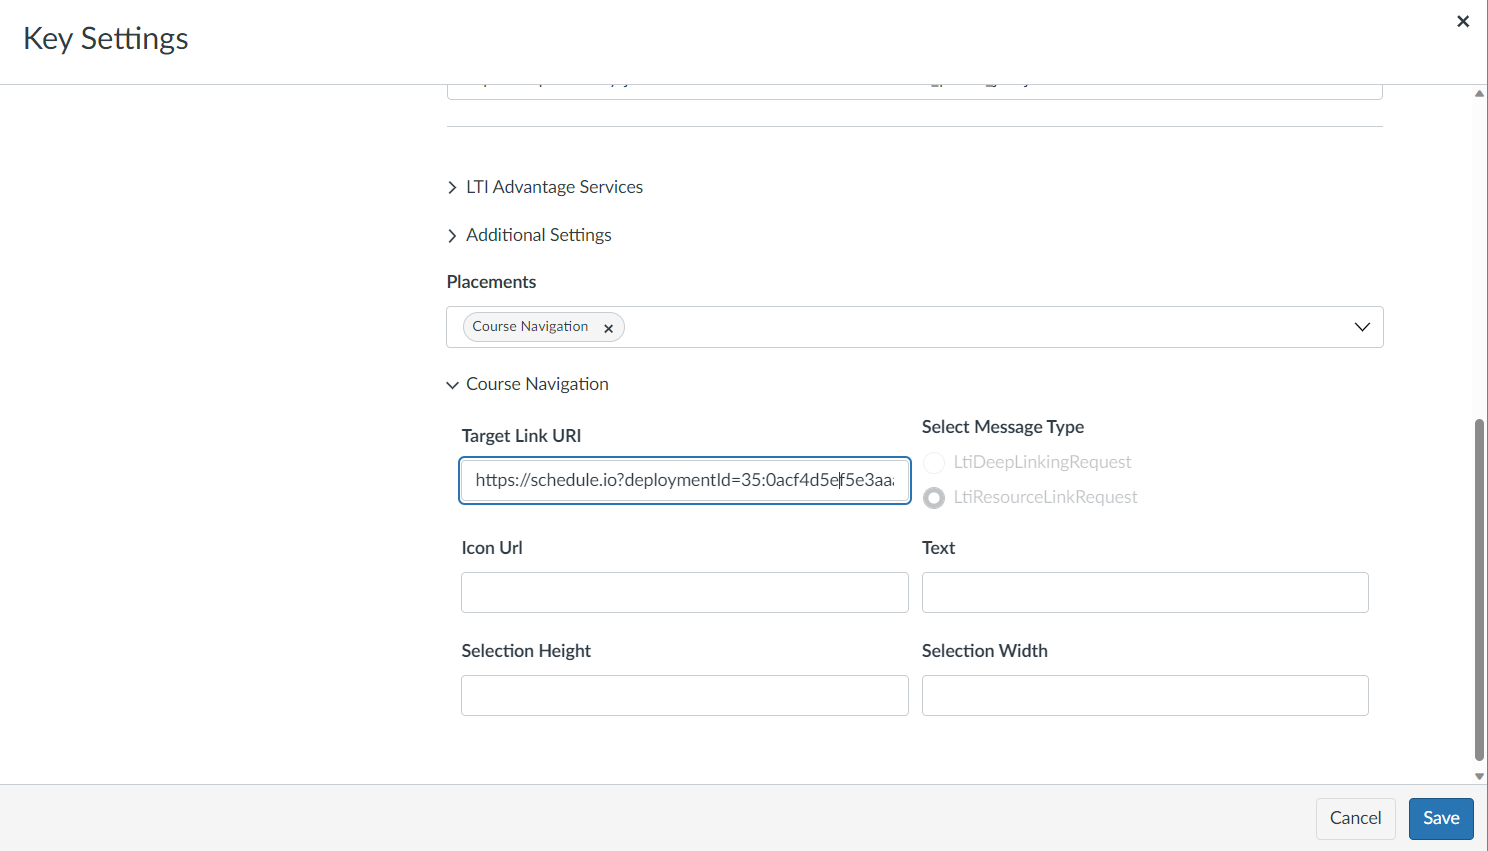
Click Save to save the changes.
Step 3: Register information in UNIVERSE Manager
Log in to UNIVERSE Manager.
Click the LTI Settings from the navigation.
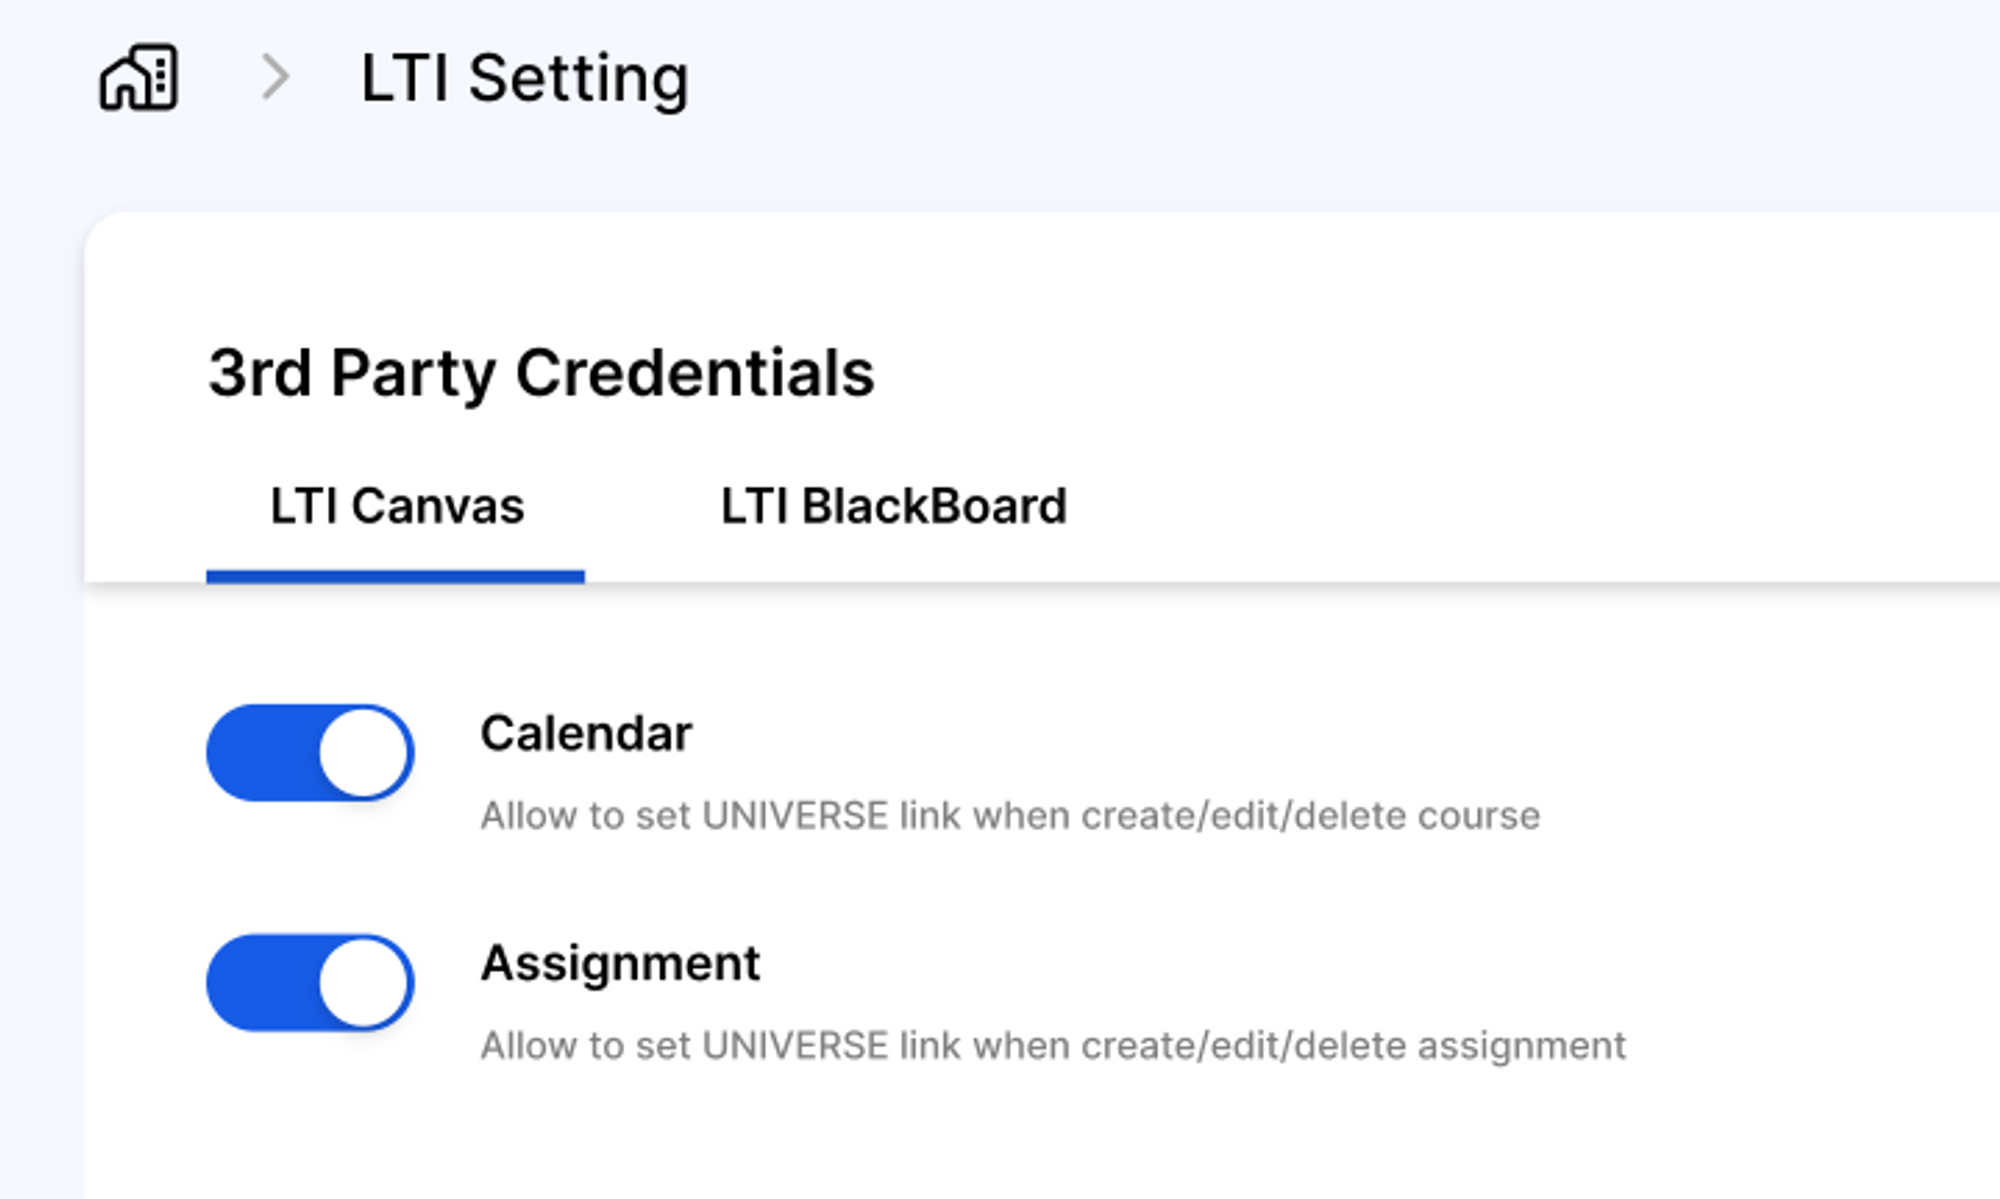
Set the Calendar State to ON.
Click Add Instance, then select Type to Schedule.
The Add Instance screen will appear below.

Where can you get the information to enter in each field?
Site Domain
The domain of your Canvas site.
* Make sure there's no slash at the end of the copied domain name
Client ID
The Developer ID from the Canvas LTI Developer Key for LTI 1.3.
* This should already be configured.
Deployment ID
The Developer ID from the Canvas LTI Developer Key for LTI 1.3.
Developer ID
The Developer ID from the Canvas API Developer Key.
Developer Key
In the Canvas API Developer Key, click Show Key to display and then copy the key to UNIVERSE Manager.
Note
The optional field allows you to write down any notes as reminders.
Step 4: Enable Calendar feature in Canvas and UNIVERSE manager
4.1 Canvas
Log in to Canvas.
Click Admin, click Settings, then choose the Feature Options tab.
Enable Calendar Series.
Log in to UNIVERSE Manager.
Click the LTI Settings from the navigation.
Set the Calendar State to ON.
Step 5: Install App in Canvas Course
Log in to Canvas.
Click Course, then click Settings.

Click + App.
Change the Configuration Type to By Client ID.

Copy the Developer ID from the Canvas LTI Developer Key and paste it into this Client ID field.

You can find the Client ID from the Developer ID in the Canvas LTI Developer Key for LTI 1.3.

Click Submit, then click Install.
Step 6: Launch the tool
Find the UNIVERSE TOOL from your menu.
Manage your navigation from Settings.


